GAMMAFP 사이트에서 애니메이션 만들기
이제 한 단계 더 나아가 실제로 Sprite에 애니메이션을 적용해 보겠습니다.
Atlas Packer를 만들었던 GAMMAFP 사이트에 다시 들어갑니다.
Tools
Developer with web technologies, HTML5 video games, tools and tips that make your life easier
gammafp.com:443
Animator Tool을 클릭합니다.

X 버튼을 누릅니다.

다음 화면이 보입니다.

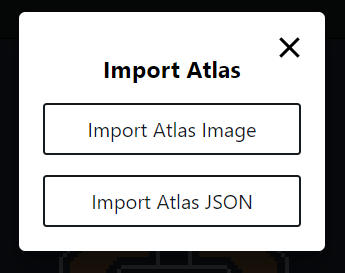
Import Atlas 버튼을 클릭합니다.


각각의 버튼을 클릭하여 이전 포스팅에서 다운로드하였던 PNG 파일과 JSON 파일을 둘 다 Import 합니다.

이후 Animations 옆에 있는 + 버튼을 눌러 walk와 idle을 만들어줍니다.

walk를 선택한 상태에서 walk에 해당되는 프레임을 클릭하여 Frames에 채워줍니다.

idle도 마찬가지로 idle을 선택한 상태에서 idle에 해당되는 프레임을 클릭하여 Frames를 채워줍니다.

재생 버튼을 눌러봅니다. 잘 움직이나요?

움직이는 것까지 확인했으면 Save animation 버튼을 클릭하여 zip 파일을 다운로드합니다.

압축을 풀고 단일 JSON 파일을 assets\images 폴더에 넣습니다.

MainScene.js에서 해당 애니메이션 로드하기
이제 MainScene.js에 만든 JSON 파일을 적용해 보겠습니다.
preload()에 코드 추가하기
preload()에 아래의 코드를 추가합니다.
this.load.animation('princess_anim', 'assets/images/princess_anim.json');
update()에 코드 추가하기
이제 player가 움직일 때마다 애니메이션을 적용하기 위해서 update()에 아래의 코드를 추가합니다.
this.player.anims.play('princess_walk', true);
princess_anim.json 수정하기
거의 다 끝났습니다.
마지막으로 princess_anim.json 파일의 "key" 부분을 모두 수정해 줍니다.


"idle"이라고 적힌 부분을 "princess_idle"로 바꿔줍니다.

"walk"라고 적힌 부분을 "princess_walk"로 바꿔줍니다.

실행하기
이제 index.html 파일로 가서 우클릭 후 Open with Live Server를 실행합니다.

저처럼 player가 가만히 있을 때와 움직일 때 애니메이션이 동작한다면 성공입니다😃
지금까지의 코드
MainScene.js
export default class MainScene extends Phaser.Scene {
  constructor() {
    super("MainScene");
  }
  preload() {
    console.log("preload");
    this.load.atlas(
      "princess",
      "assets/images/princess.png",
      "assets/images/princess_atlas.json"
    );
    this.load.animation("princess_anim", "assets/images/princess_anim.json");
  }
  create() {
    console.log("create");
    this.player = new Phaser.Physics.Matter.Sprite(
      this.matter.world,
      0,
      0,
      "princess",
      "princess_idle_1"
    );
    this.add.existing(this.player);
    this.player.inputKeys = this.input.keyboard.addKeys({
      up: Phaser.Input.Keyboard.KeyCodes.W,
      down: Phaser.Input.Keyboard.KeyCodes.S,
      left: Phaser.Input.Keyboard.KeyCodes.A,
      right: Phaser.Input.Keyboard.KeyCodes.D,
    });
  }
  update() {
    // console.log("update");
    this.player.anims.play("princess_walk", true);
    const speed = 2.5;
    let playerVelocity = new Phaser.Math.Vector2();
    if (this.player.inputKeys.left.isDown) {
      playerVelocity.x = -1;
    } else if (this.player.inputKeys.right.isDown) {
      playerVelocity.x = 1;
    }
    if (this.player.inputKeys.up.isDown) {
      playerVelocity.y = -1;
    } else if (this.player.inputKeys.down.isDown) {
      playerVelocity.y = 1;
    }
    playerVelocity.normalize();
    playerVelocity.scale(speed);
    this.player.setVelocity(playerVelocity.x, playerVelocity.y);
  }
}princess_anim.json
{
  "anims": [
    {
      "key": "princess_idle",
      "type": "frames",
      "repeat": -1,
      "frameRate": 12,
      "frames": [
        {
          "key": "princess",
          "frame": "princess_idle_1"
        },
        {
          "key": "princess",
          "frame": "princess_idle_2"
        },
        {
          "key": "princess",
          "frame": "princess_idle_3"
        },
        {
          "key": "princess",
          "frame": "princess_idle_4"
        }
      ]
    },
    {
      "key": "princess_walk",
      "type": "frames",
      "repeat": -1,
      "frameRate": 12,
      "frames": [
        {
          "key": "princess",
          "frame": "princess_walk_1"
        },
        {
          "key": "princess",
          "frame": "princess_walk_2"
        },
        {
          "key": "princess",
          "frame": "princess_walk_3"
        },
        {
          "key": "princess",
          "frame": "princess_walk_4"
        }
      ]
    }
  ]
}
'🐣 일하면서 공부하기' 카테고리의 다른 글
| [Phaser3] Survival Game(11) - Layer 하나 더 쌓고 collides 구현하기 (0) | 2023.02.16 |
|---|---|
| [Phaser3] Survival Game(10) - MainScene.js 살짝 수정 및 Tiled 적용하기 (0) | 2023.02.15 |
| [Phaser3] Survival Game(9-1) - player에 캐릭터 적용하기 (0) | 2023.02.13 |
| [Phaser3] Survival Game(8) - 16 x 16 RPG Characters 생성 (0) | 2023.02.12 |
| [Phaser3] Survival Game(7) - create()에 player 추가 및 키보드 이벤트 (0) | 2023.02.11 |
